In the first section, I added all the hardware to the inside of the incubator. Now I’m going to wire everything up, ready for the software.
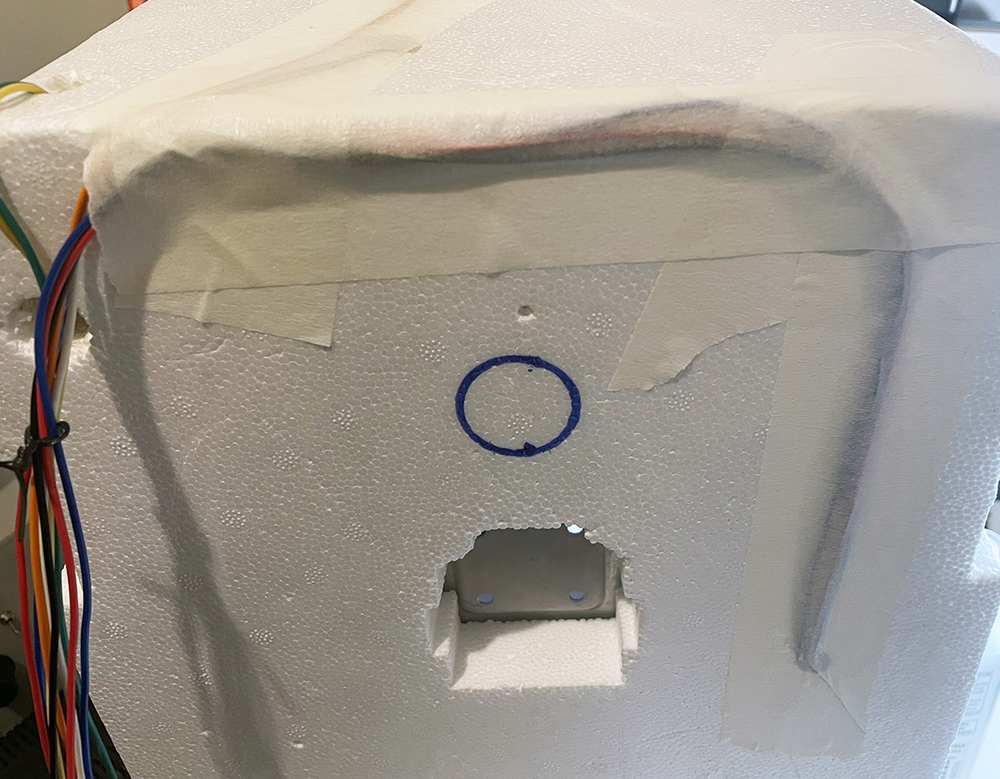
Now that the sensors are mounted inside the incubator. The wires have been carefully threaded through holes drilled into the inner metal shell. The incubator comprises an inner metal shell, a polystyrene box, and an outer plastic shell. To avoid exposing the wires to any heat emanating from the inner shell, they are routed through the metal and polystyrene, then around the exterior of the polystyrene, and finally exit through a pre-existing hole in the back of the plastic shell. I took the liberty of taping them down to simplify the reassembly process.

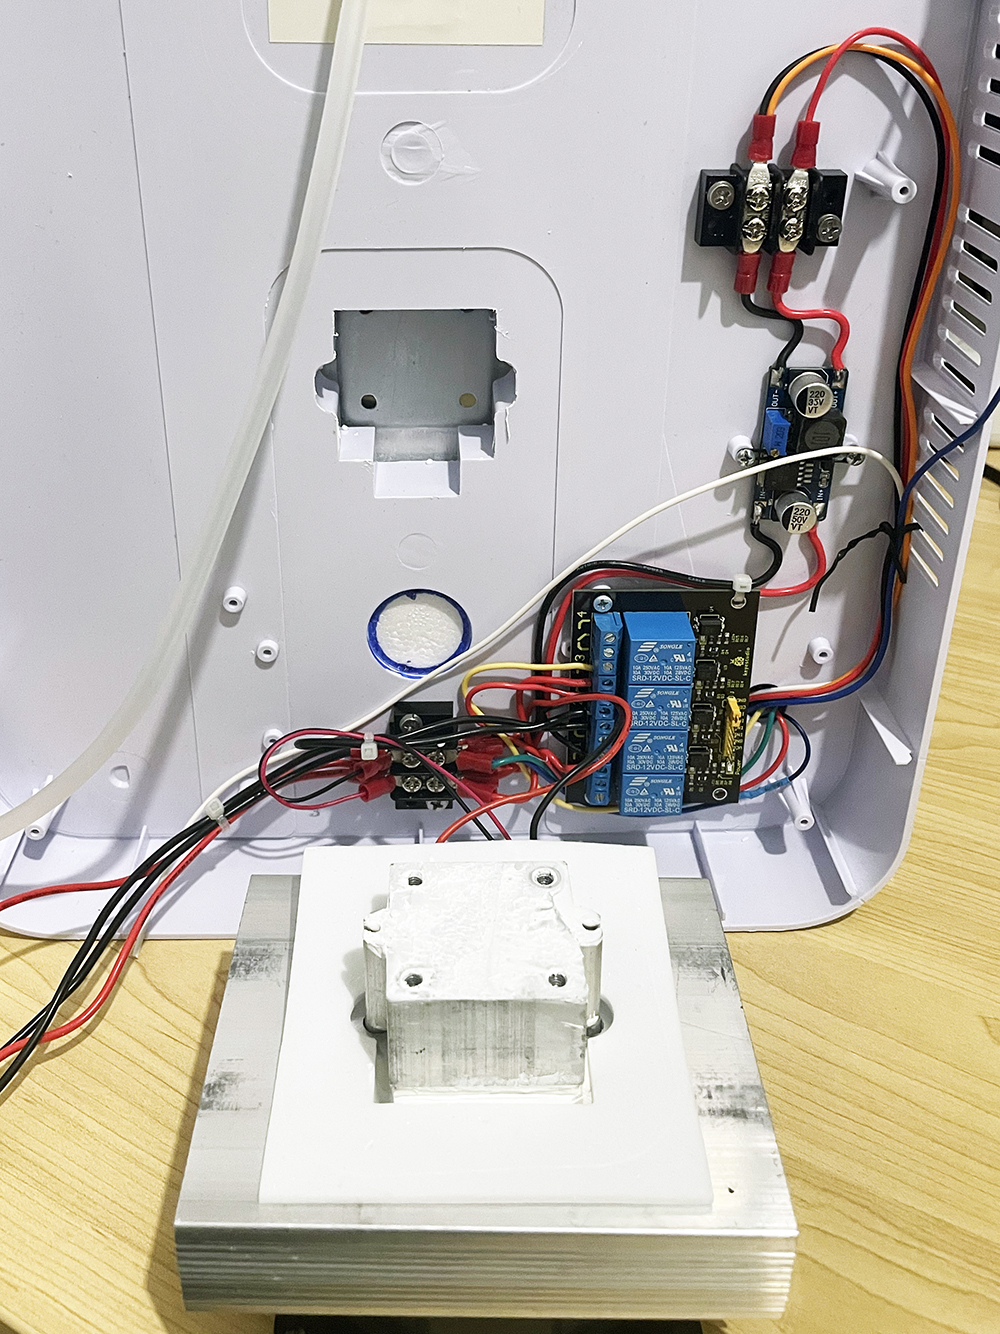
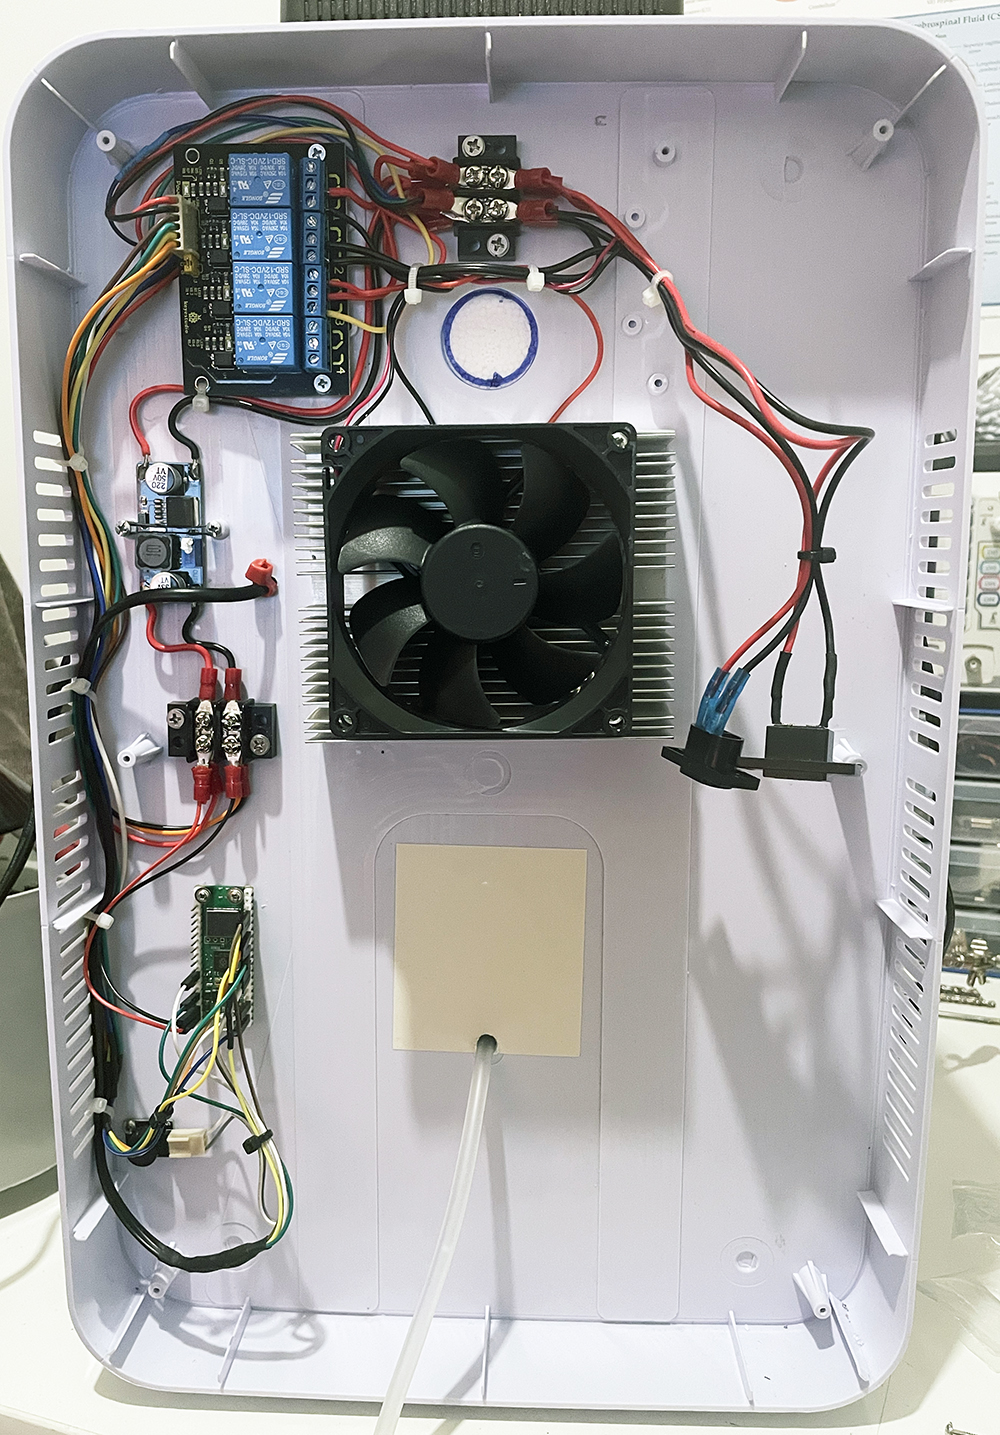
I used terminal blocks to neaten up the multiple power wire connections and separated them between 12v and 5v supplies. A four-channel relay board was used to control the heater, CO2 solenoid and the internal fan. The light uses the same relay as the internal fan, with the fan on normally closed (NC) and the light on normally open (NO). That way, the relay can be controlled by the door switch. If the door is open, then the light is on, and the fan is off to reduce the amount of heat and CO2 loss through the open door.
A power regulator was used to provide a clean 5v supply to the Raspberry Pi Pico as well as the sensors that require a 5v supply. The hole where the wires emerge can be seen at the bottom right corner.

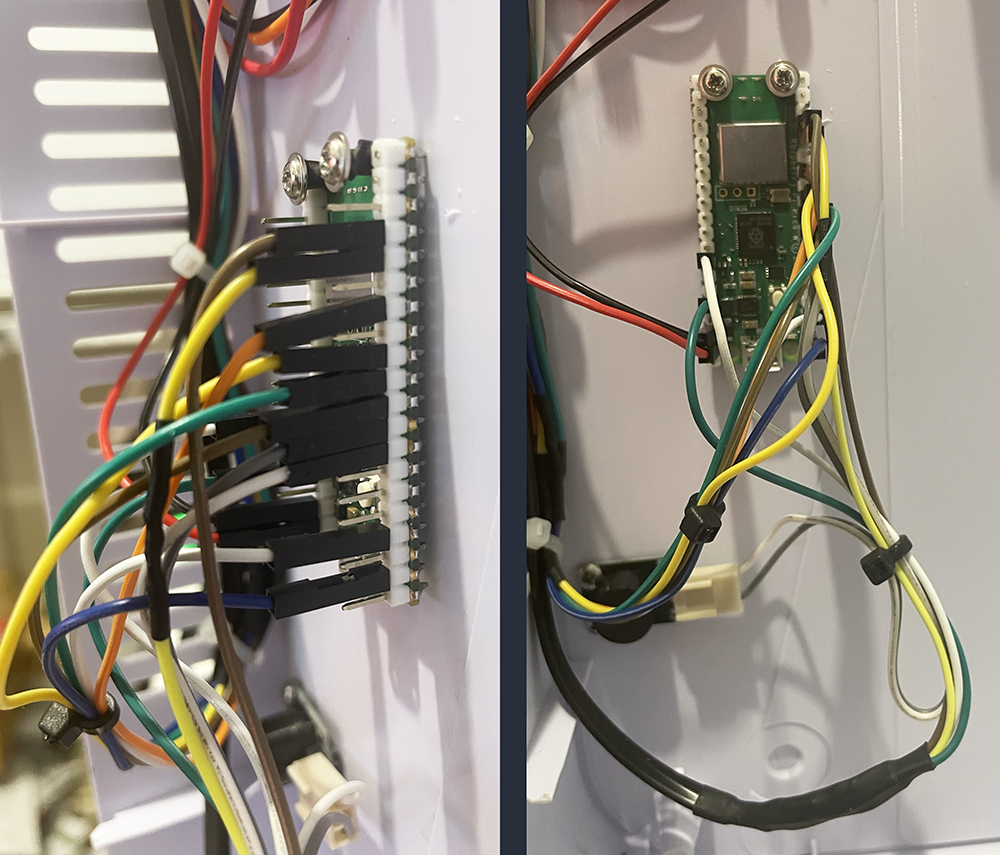
The Raspberry Pico was mounted with a couple of M2 screws using heat-shrink tubing on the shafts to reduce the chance of shorts. The header pins were soldered on the front of the board instead of the back so it could be mounted front facing up. The sensors were connected using standard header jumper wires to allow easy removal. A point of note: the CO2 sensor requires a 3.3v power source, which is provided by pin 36 on the Pico. A buzzer was also added to be used for warnings like the door open too long or under/over temp, etc.

And that’s it, all wired up and ready to go!

now that the hardware is all done, it is time for some code. That will be in the next section.